Submersible Pump Installation: A Step-by-Step Guide from Btali International
Btali International understands the importance of a properly installed submersible pump for efficient and reliable water management. This comprehensive guide will walk you through the entire process, ensuring you achieve a successful installation. Whether you’re dealing with a deep well, a shallow well, or a sump pump application, this detailed walkthrough will equip you with the knowledge to tackle the job effectively. We’ll cover everything from planning and preparation to final testing and maintenance, ensuring you can enjoy the benefits of your new submersible pump for years to come.
Planning and Preparation: The Foundation for Success
Before you even think about putting a wrench to a pipe, thorough planning is crucial. This phase lays the groundwork for a smooth and efficient installation process. Neglecting this stage can lead to costly mistakes and delays.
1. Assessing Your Needs: Understanding Your Water Source
The first step involves carefully assessing your specific needs. This includes determining:
- Water Source: Is it a well (deep or shallow)? A cistern? A sump pit? Understanding the source dictates the type of submersible pump needed and the installation method. Deep well pumps require different considerations than shallow well pumps or sump pumps. The depth of the water source is also a key factor in selecting the appropriate pump and pipe length.
- Water Requirements: How much water do you need per minute or per hour? This dictates the pump’s horsepower (HP) and gallons per minute (GPM) capacity. Overestimating your needs leads to unnecessary expense, while underestimating can result in inadequate water supply.
- Water Pressure: What is the required pressure for your application? Residential use has different pressure requirements than agricultural or industrial applications. Consider the distance between the pump and the point of use. The further the distance, the more pressure is required.
- Power Source: Ensure you have a dedicated power source appropriate for your pump. This often involves checking the voltage and amperage requirements and ensuring your electrical panel can handle the load. You may need to install a new circuit breaker and conduit for safety.
- Permitting: Check with your local authorities regarding any necessary permits for installing a submersible pump, especially if it involves well drilling or significant ground disturbance.
2. Gathering the Necessary Tools and Materials
Having all the necessary tools and materials at hand will significantly expedite the installation process. This minimizes downtime and avoids unnecessary trips to the hardware store. You’ll need:
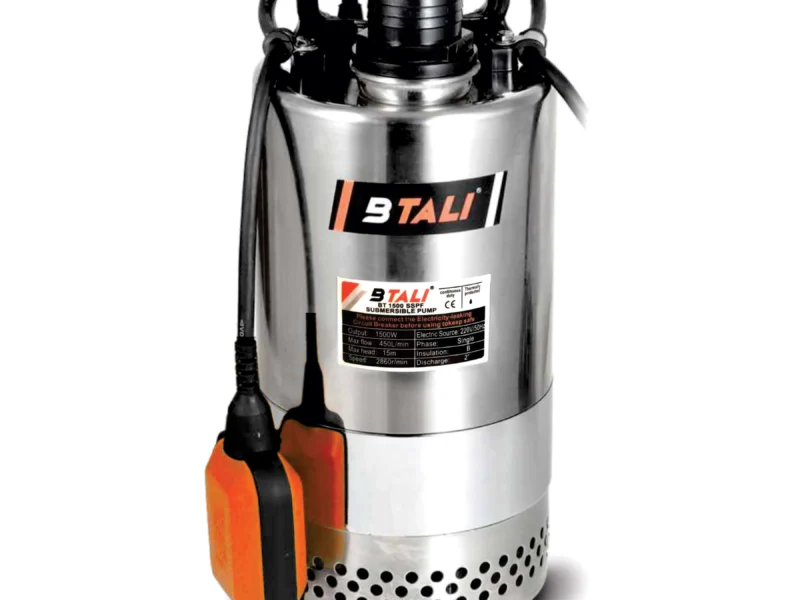
- Submersible Pump: Choose a pump from a reputable brand like those distributed by Btali International, ensuring it matches your assessed needs.
- Pipe (PVC or other suitable material): The diameter and length of the pipe depend on your water source depth and the pump’s specifications. Remember to factor in additional length for connections and future maintenance.
- Check Valve: Prevents backflow of water when the pump is off, maintaining prime.
- Foot Valve: Placed at the end of the pipe intake, it prevents the pipe from emptying when the pump is not running.
- Pump Cable: A heavy-duty cable designed for submersible pumps, with sufficient length to reach the power source. Properly sized and adequately sealed, it prevents electrical shorts and water damage.
- Discharge Pipe: This carries the water from the pump to your desired location. Ensure it’s made of a corrosion-resistant material suitable for the water chemistry.
- Pressure Switch (optional but recommended): Automatically turns the pump on and off based on water pressure.
- Pressure Tank (optional but recommended): Minimizes pump cycling, extending its lifespan and reducing wear and tear.
- Pipe Fittings: Elbows, tees, unions, and couplings as needed. Choose corrosion-resistant fittings made from materials compatible with your pipes and pump.
- Sand or Gravel (for well installations): Creates a filter bed to prevent sand from entering the pump.
- Electrical Conduit and Fittings: Protect the electrical wiring from damage and ensure compliance with electrical codes.
- Tools: Shovel, wrench set, pipe cutter, level, multimeter, cable clamps, sealant, electrical tape, and possibly a pipe threader.
Step-by-Step Submersible Pump Installation
Now that you’ve planned and gathered everything, let’s proceed with the installation. Remember, safety is paramount. Always turn off the power before working on any electrical components.
1. Preparing the Well or Sump Pit
- Well Installation: If installing in a well, ensure the well is properly cleaned and free from debris. This will prevent damage to the pump and ensure efficient water intake.
- Sump Pit Installation: Clean the sump pit thoroughly, removing any accumulated sediment or debris. This is crucial for ensuring the pump functions correctly and avoids clogs.
2. Installing the Foot Valve and Pipe
- Securely attach the foot valve to the end of the intake pipe. Ensure a watertight seal to prevent leaks and maintain prime.
- Carefully lower the intake pipe into the well or sump pit, making sure it reaches the desired depth.
3. Attaching the Submersible Pump
- Connect the submersible pump to the intake pipe securely.
- Ensure all connections are watertight, using appropriate sealant and tightening the fittings properly.
- Carefully lower the pump into the well or sump pit, ensuring it is properly positioned.
4. Connecting the Discharge Pipe
- Connect the discharge pipe to the pump’s outlet. Ensure a tight and secure connection, using appropriate sealant to prevent leaks.
- Route the discharge pipe to your desired location. Use pipe supports for proper alignment and avoid sagging.
5. Connecting the Electrical Wiring
- Connect the pump’s cable to the power source, following all relevant electrical codes and using appropriate safety measures. Using a qualified electrician is highly recommended for this step, especially when dealing with high-voltage systems.
- Protect the wiring with an appropriate conduit to protect it from water and potential damage.
- Ensure all connections are properly grounded for safety and to prevent electrical shocks. Never compromise on electrical safety.
6. Pressure Switch and Pressure Tank Installation (Optional)
- If using a pressure switch and pressure tank, install them according to the manufacturer’s instructions. This helps in regulating water pressure and minimizing pump cycling.
- Ensure the connections are properly sealed to prevent leaks and air infiltration.
7. Testing and Commissioning
- Carefully test the system by turning on the power supply.
- Check for any leaks around the pump and pipe connections.
- Monitor the water flow and pressure to ensure everything is functioning correctly. Adjustments might be needed if the pressure or flow is not optimal.
- Listen for any unusual noises from the pump, which may indicate a problem.
8. Post-Installation Maintenance
Regular maintenance is crucial for prolonging the lifespan of your submersible pump. This includes:
- Regular Inspections: Check for leaks, corrosion, and any signs of wear and tear.
- Cleaning: Periodically clean the pump and the intake pipe to remove debris and sediment.
- Lubrication: Some submersible pumps require periodic lubrication according to the manufacturer’s instructions.
- Professional Service: Schedule regular maintenance checks by a qualified professional. Btali International offers comprehensive maintenance and service packages to keep your system operating at peak efficiency.
Choosing the Right Submersible Pump for Your Needs
Btali International offers a wide range of high-quality submersible pumps to meet diverse applications. When selecting a pump, consider the following:
- HP (Horsepower): Determines the pump’s power and its capacity to move water.
- GPM (Gallons Per Minute): Indicates the volume of water the pump can deliver per minute.
- Head (Lift Height): Refers to the vertical distance the pump can lift water.
- Material: Select a pump constructed from durable materials suitable for your water source’s chemistry and temperature. Stainless steel and other corrosion-resistant materials are ideal for many applications.
- Type: Choose the appropriate pump type (deep well, shallow well, sump pump) based on your specific needs and water source.
Troubleshooting Common Issues
Even with careful installation, you might encounter some issues. Here are some common problems and their solutions:
- No Water Flow: Check the power supply, the pipe connections, and the foot valve. Ensure the pump is properly primed and the intake pipe is not clogged.
- Low Water Flow: The pump may be undersized or the intake pipe may be clogged. Check the pump’s specifications and clean the intake pipe.
- Pump Runs Continuously: There might be a problem with the pressure switch or the pressure tank. It might also indicate a leak in the system.
- Unusual Noises: Listen closely for unusual noises. Grinding sounds might indicate bearing wear, while humming suggests electrical problems. Professional service may be required.
Btali International is committed to providing high-quality submersible pumps and comprehensive support. Our expert team is available to assist you with any questions or concerns you may have throughout the entire process, from selecting the right pump to providing ongoing maintenance services. Contact us today to learn more about our products and services.